Getting Started with a Kayak
Fishing off the bank is great for starting out the kids or hanging out with friends drinking beer but its not very productive for bass. Catfish fishing is different but going after bass with spinners, top water or rubber worms means need to go to where the fish are at. Kayaks can take you there.
Starting out you need to know the basics. There are a lot of utube videos on kayak selection and they are worth a look but it comes down to how much do you want to spend?
Bottom Line up Front (BLUF): I found a used, sit on top, 12 foot at Dick’s has been exactly what fit my needs. I got really lucky for once. Take time and do not rely on getting lucky.
Kayak Types
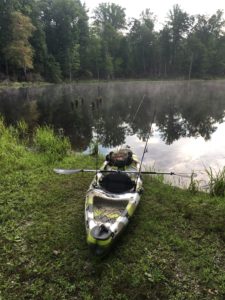
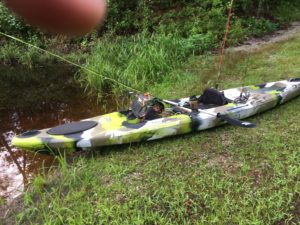
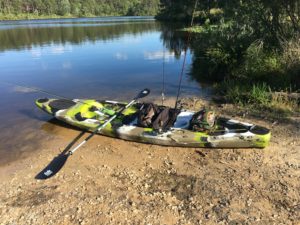
Two basic flavors exist: Sit on top or sit inside. Sit on top is much easier to have quick access to tackle as well as landing fish. Launching a sit on top gives you a lot of options that are easily adaptable to a beach/shore entry. Lakes on installations may not have great sites to launch. You can count on getting wet below the knees. Getting to tackle is the key thing. Strapping gear down allows you to take it out on the water, but may not allow for reaching it unless you are a gymnast. Landing fish is easy in a sit on top. The last thing you need inside your sit inside kayak is a 24 inch pickerel with a couple of treble hooks looking for a place to rest.
Pro’s and Con’s (Don’t over think this)
Sit Inside
Plus: Lighter
Plus: Cooler weather capability / remain dry
Con: Access to Tackle
Con: launching and getting out of the water
Sit On Top
Plus: Access to Tackle
Plus: Launching and getting out
Plus: Adaptable and easier to customize
Con: You will get wet from the scupper holes (drain holes); not an issue unless the temperature drops below 60 F
Con: Heavier
MY SOLUTION
I went to Dick’s in Fayetteville to purchase a Field and Stream Talon (sit on top / 12foot fishin 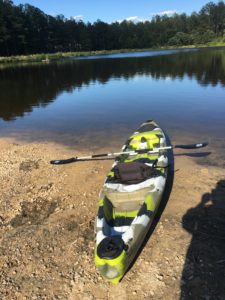
g Kayak) that was on sale over the weekend. They did not have one on site but a customer brought one in while I was there as a return. His story was that he tested it in his pool and did not like the fit. I looked it over and it was missing a
grommet or so. The manager wanted to sell it to me at pre-sale price. I pulled out the anchor from the bow cargo bay and it had aquatic grass wrapped around it. I haggled the price below the sale price and saved the associate from having to lug it back to the rear. Everyone was happy and I loaded up a Kayak on my truck. I drove off fast before anyone changed their minds and picked up the paddle at Gander Mountain before they closed. Total cost: Less than $400.00 and its very functional.
EXTRA ITEMS (Things to Consider for Kayak Accessories)
Paddles: My paddle was almost a quarter the cost of my used kayak. Get one that you can adjust to optimize your stroke. This is one place you do not want to cut cost on. My paddle is the only thing I tie down besides the anchor and camera case.
Life / Tackle Vest: If you are on Base fishing, a life vest is mandatory. Not having one is the fastest way to get the attention of a game warden. These are not cheap life vest. I have one with two big pouches for tackle, snacks and camera. Keep your BUG SPRAY in your vest.
Anchor: Got to have! Wind and current will push you all over and you need to be stationary to work a spot. Its simple. Just get a small anchor with a rope. Keep it cheap because in lakes with lots of underwater structures, you may lose an anchor.
Seats: Get the best you can afford for the kayak you purchased. Comfort becomes an issue after three hours on the water. If you make a custom seat, consider how it changes your center of gravity. Inches can be significant. The seat in my Field and Stream Talon is just a pad that attaches to the kayak with minimal back support. It’s pretty much worthless. Good seats are expensive.
Handles: one on the bow and aft make life easier for loading. Ones set in the middle are handy as well.
Active Rod Holders: Unless it is within reach based on where you sit, these are useless. Then again I might be doing something wrong.
Rod Storage: These are holes behind the seat. If you go out with more than one rod, they are a must have item. My rig is two spinner rigs in the holes behind me and a fly rod on the deck in front of me.
Anchor System: My Field and Stream has a anchor system on the port side behind the seat. It’s a simple rope
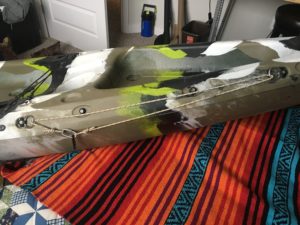
attached to a clip where the anchor line runs through. This allows me to move the anchor location to the back. This only comes into play with some wind conditions. Normally I just keep it near the seat. I also use a clip to attach the anchor rope and secure the rope using a slip knot on the grommet just behind my seat. The storage area behind the seat is where I store the line.
Camera Storage: I use a small pelican case that I tie down to the hull. I also use a small pelican case to hold lures that are not in my vest that I may want to consider.
Foot Holds: Get ones that are adjustable. This allows you to shift your position on long days or shift if you change your seat.
Emergency Kit: Whistle, small first aid kit, Flash Light. If you can fit this in your vest, it’s a smart selection.
TRICKS
Risk Mitigation: I do not take anything out on the water in a kayak that I might be afraid to lose in the event of a capsizing event. I have never flipped out on the water, but I’ve been close a couple of times hitting hidden stumps. Leave your keys and wallet in the car if you have an external locking system. If you take a wallet on the water, place it in a waterproof bag. If you take keys out, tie them to your person.
Rod Tie Downs: I do not tie down rods. If I flip, the last thing I need getting me tangled is rods with lures attached that are bungeed down to the flipped kayak. I’ve never come close to losing a rod that was stored without being secured by a bungee.
Storing Rods with Lures: The purpose of have several rods to me is to have different lures tied and ready. Its almost like a golf bag where you select the right club for the job: Crank bait on the left and a popper on the right. I also store rods while traveling between spots to keep the cockpit clear.
Tackle: I load lures that I anticipate on using in my vest. I have a small pelican case for additional lures that I place in the cockpit. If I go out for a full day, I will take my big “tacklebox” to either stow in the back or up front in the cockpit. If I think I will need to access it on a regular basis, I place it in the cockpit.
Feet: Adjust your foot pedals before you get out in deep water. Its just easier while on the bank or near the shore. I strongly recommend sneakers or something that covers your feet. You need protection from fish, hooks and the sun. After a snag, you never know where a treble hook may wind up but you don’t want one in your foot.
Drinking Water: I take at least a jug and often times a squirt bottle. My kayak has a holder with a bungee cord for a squirt bottle. It also has a compartment for a circular jug just behind the seat. That feature is nice but not a necessity.
Cautions / Lessons Learned
- PCI or PCC’s: For all you great American’s out there who are not Veterans or Troopers, These acronyms are Pre Combat Checks or Pre Combat Inspections. Simple translation is make a list and go over it before you shove off the bank. Too many times, I got on the water and realized the anchor is in the truck bed in the parking lot. I attach my list to my seat. Yes, I have shoved off without my seat. Once you launch, you just hate going back. PCC’s will help prevent the need for a U Turn.
- Store things in the same place each time to create muscle memory.
- Row Slow when in an area with stumps.
- Be careful during a launch if there is a lot of vegetation nearby. On one launch, my fly rod caught a bush and snapped the front section clean off.
- Seats: I attempted to make a seat that fit into the scupper holes. Materials including the stadium seat came to $34.00. 1 ½ inch PVC tubing fit snuggly in the scupper holes and made a solid anchor for the seat. 4x elbows, 1x 8 foot straight section, 6x T sections plus cement and a cheap hand saw. The PVC pipe attached to the stadium seat and set in the scupper holes. The back support did not support. The 3 inch higher center of gravity was very noticeable. I recommend you buy a higher end kayak with a proper seat or just suck it up. I have tried just sitting on the plastic of the Kayak and that gets old quick. If you buy a second hand Kayak without a seat, just get a square life preserver and sit on it. You can cut it to fit.
https://bluecordfishermen.com/lessons-learned/
 bluecordfishermen
